Monday, October 29, 2012

Pumpkin Cinnamon Bun Crusade


I have a slight obsession with perfecting the cinnamon bun. It's quite possibly my favorite thing to bake because it combines my childhood love for bread with that tiny sweet tooth we all try to control.  Bread + Sugar... anything other than amazing is impossible.


As the world of baking opened up, I was stunned to find all the possibilities that the cinnamon bun method holds. Who says it has to be the traditional "Cinnabun" (a treat my brother still uses to lure me into Tysons mall during the holidays)? You can use apples, raspberries, raisins, chai, and even cereal. Endless potential in a relatively easy method!


Then I saw the holy grail of cinnamon buns: pumpkin. This version is from Smitten Kitchen. Time permitting, I have a whole hit list of pumpkin cinnamon bun recipes:
Oh you don't know about my powerful attraction to pumpkin? Pumpkin is without a doubt that perfect fall flavor. I chug pumpkin spice lattes and chai. Pumpkin muffins are a sinful pleasure, especially with cream cheese. I even like toasted pepita seeds. Pumpkin pumpkin everything! 


Well. Almost anything. This is my second attempt at pumpkin cinnamon buns and I got to tell you... not impressed. I don't blame you pumpkin, God no. I have a sneaking suspicion that pumpkin does not work well as a yeast product. There's too much moisture and the flavor is so subtle that it can easily be overpowered by spices. Even the Panera pumpkin spice bagel doesn't do it for me... yet pumpkin squares are a win every time.


Now don't get me wrong, it's not that like these cinnamon buns are gross. They have all the classic cinnamon bun attributes- warm, cinnamon, and a gooey top. As for being a PUMPKIN cinnamon bun? We didn't taste pumpkin... something was different about the flavor and we struggled to describe it. Mike found it dense but he did like the caramelized edges. I didn't like having to rely so much on the frosting for sweetness. I prefer the Amish girl version with caramel icing. Don't worry pumpkin cinnamon rolls, we'll get there!

Have a killah pumpkin cinnamon bun recipe? Don't hold out! Please share! And if you're on the East Coast, hang in there. This storm should be mellowed out by tomorrow afternoon.  Sending love and sunshine from our townhouse basement.

Sunday, October 28, 2012

Breakfast Quesadilla


Introducing Michael's Breakfast Quesadilla of Great Virtue. Yes, he came up with that title on his own. This is what you get when you're engaged to an artist; there's too much creativity under one roof. I love it!


This meal came into existence after a night of white bean and sweet potato burritos. Often times, I struggle with left over ingredients that are specific to a single recipe. Carbs aren't a big part of a our daily diet unless it's in the form of homemade pizza or take out (rice, sandwiches, etc.). The one meal that we always make is breakfast. It's usually in the form of oatmeal and bananas. I decided to attack the flour tortilla's from a morning perspective.


The Breakfast Quesdilla is nothing fancy but the taste is gourmet. A sauce pan is lightly coated in extra-virgin olive oil on a very low heat. The tortilla is gentle warmed, only to the point of faint brown marks. 


In a smaller separate sauce pan, I cooked egg whites beaten with a generous helping of dried garlic. Oh it smelt so lovely! You could easily use fresh garlic, but this is rush hour in our house. We almost always make breakfast the night prior.


On deck, the halved baby tomatoes, spinach, sliced onion, and 4 mix Mexican cheese await. It's super easy from this point forward, all I ask is don't burn your hand on the edge of the sauce pan.


There's no veggie sauteing required- just wilted spinach and slightly softened onions. Before you close the quesadilla, don't forget a straight single line of siriacha for the heat lovers!

I didn't really think much of it when I left this at Mike's desk for breakfast. A few minutes later though, I got an instant message with the crazy eyes and demands for a repeat of this happy quesadilla. I wasn't planning on deviating from the oatmeal plan but decided to try a bite and well... hot damn! This is a winner!


Michael's Breakfast Quesadilla of Great Virtue


make you life easy and get the veggies from the salad bar of the grocery store; don't worry about being precise on the measurements

flour tortilla
1 tablespoon olive oil
1/4 cup shredded cheese (4 cheese mexican)
1/2 cup cherry tomatoes, halved
1/4 red onion, sliced 

generous handful of spinach 
2 egg whites, whisked (optional)
2 teaspoons garlic powder
siriacha
half a ripe avocado 

Lightly coat a small saute pan with olive oil. Set to low heat. Add the egg whites and garlic powder. Whisk until cooked. Place on a small plate lined with a paper towel to absorb excess moisture.  

Lightly coat a large saute pan with olive oil. Set to low heat. Lay flour tortilla flat and allow to slightly toast. On half of the tortilla, sprinkle half of the cheese. Add halved tomotoes and cooked eggs on top. Let it cook for a minute, till cheese melts. Add spinach, onions, the remaining cheese, and a line of siriacha. And fold the other half of the tortilla. Cook for another minute until bottom of the tortilla is toasted. Check by peeking underneath with a spatula. Don't rush it- you can't take back a burnt tortilla! Flip when it's ready. Firmly press down with the back of the spatula. It won't break so don't worry.
 
 Serve with half an avocado because they make everything better!


Tuesday, October 23, 2012

Strawberry & Champagne Cake with Pink Ombre Frosting


This is a very special cake. Like many cakes, it was made for a celebration and created with deep love. There was a special ingredient in the mix this time (and no- not the champagne): hope


I hope they find a cure for cancer. 

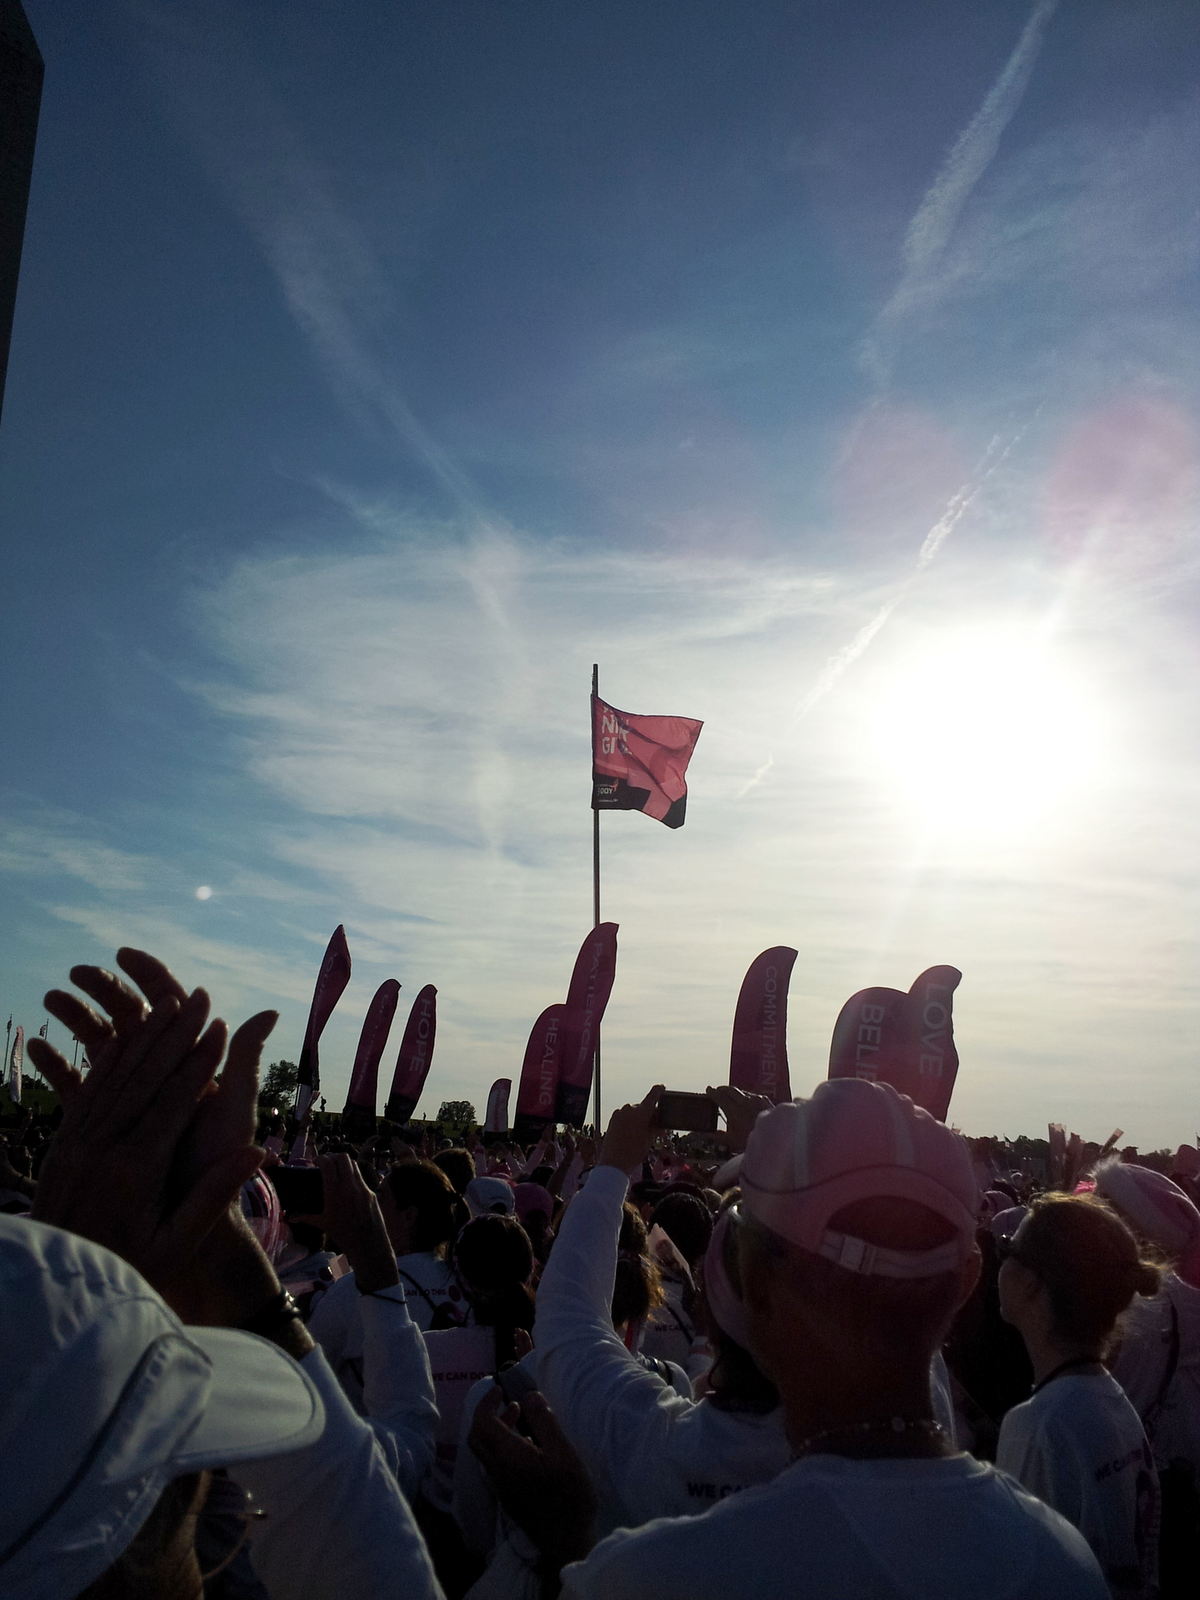
A few weekends back, I participated in the 3Day walk for breast cancer in honor of my coworker, Susan, who is a survivor. I didn't know what to expect; I've never participated in anything like this. We met at 430am and hit the trail around 730am. Powerful speakers, positive people, and a whole lot of sneakers.


Everyone on the route was encouraging and eager to make friends. It was always a shock in mid-conversation to learn that they once had cancer. What? You had cancer? But you look so... normal. Such powerful individuals. Then there were walkers sporting pictures of fallen loved ones that brought a tear to your eye. Possessing such a rare strength. I floated in this sea of pink- listening, reading t-shirts, and observing.


My initial gripe was, "what does walking 60 miles accomplish? how does that help anybody?" People kept saying it was symbolic of the physical struggle. Um, I think fighting cancer is slightly harder than walking 60 miles. It was during the journey (and yes, it's a journey because that's a lot of steps) that I realized the true purpose of the event. 


It's brings people together. It's a community. It's knowing you're not alone- be it in your personal battle or honoring someone you've lost. It's cathartic and healing. It gives hope that a cure will be found and all the pain wasn't for naught.


After the walk, our Team threw a small celebration in the office to thank all the people that donated to our fundraising. If it weren't for them, some on the team wouldn't have been able to participate. Of course, the theme was pink.


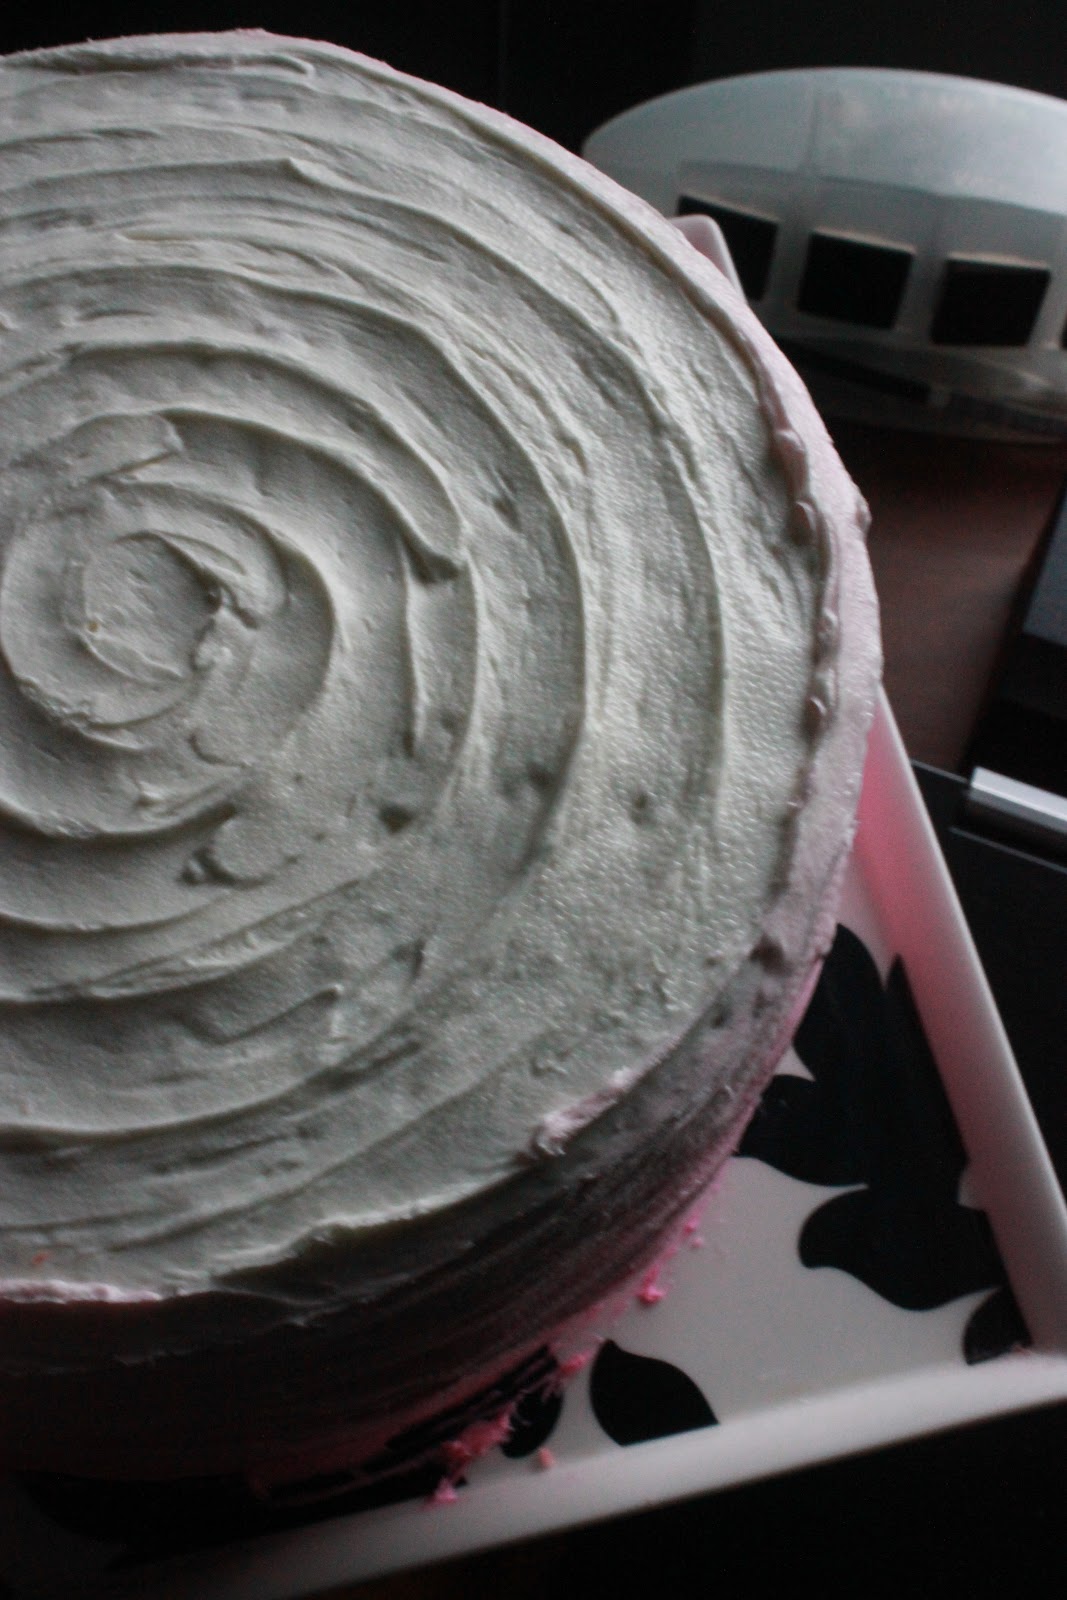
This provided the perfect opportunity to try a hip frosting style called Ombre. People are doing this with their hair color as well. It's a gradual gradient from a darker color to a light color. Pretty cool, no? It's quite impressive on this 4 layer, 9-inch round cake. (Don't mind the cake sweat pictured above- the cake was frozen overnight) The inspiration is from Apt. 2B Baking Company! Making the ombre simply requires a bit of patience, the food coloring of your choice, and 4 tiny bowls.


Simply frost three (3) rows of frosting, the bottom bring being the darkest ring of frosting. Save the lightest shade for the actual top of the cake. Gently blend the colors together. Apt 2B recommends an off-set spatula- a tool that I do not own. I used a combination of spoon and knife.  And make sure you have a spinning cake decorating stand or lazy susan- it will make frosting so much more merciful.

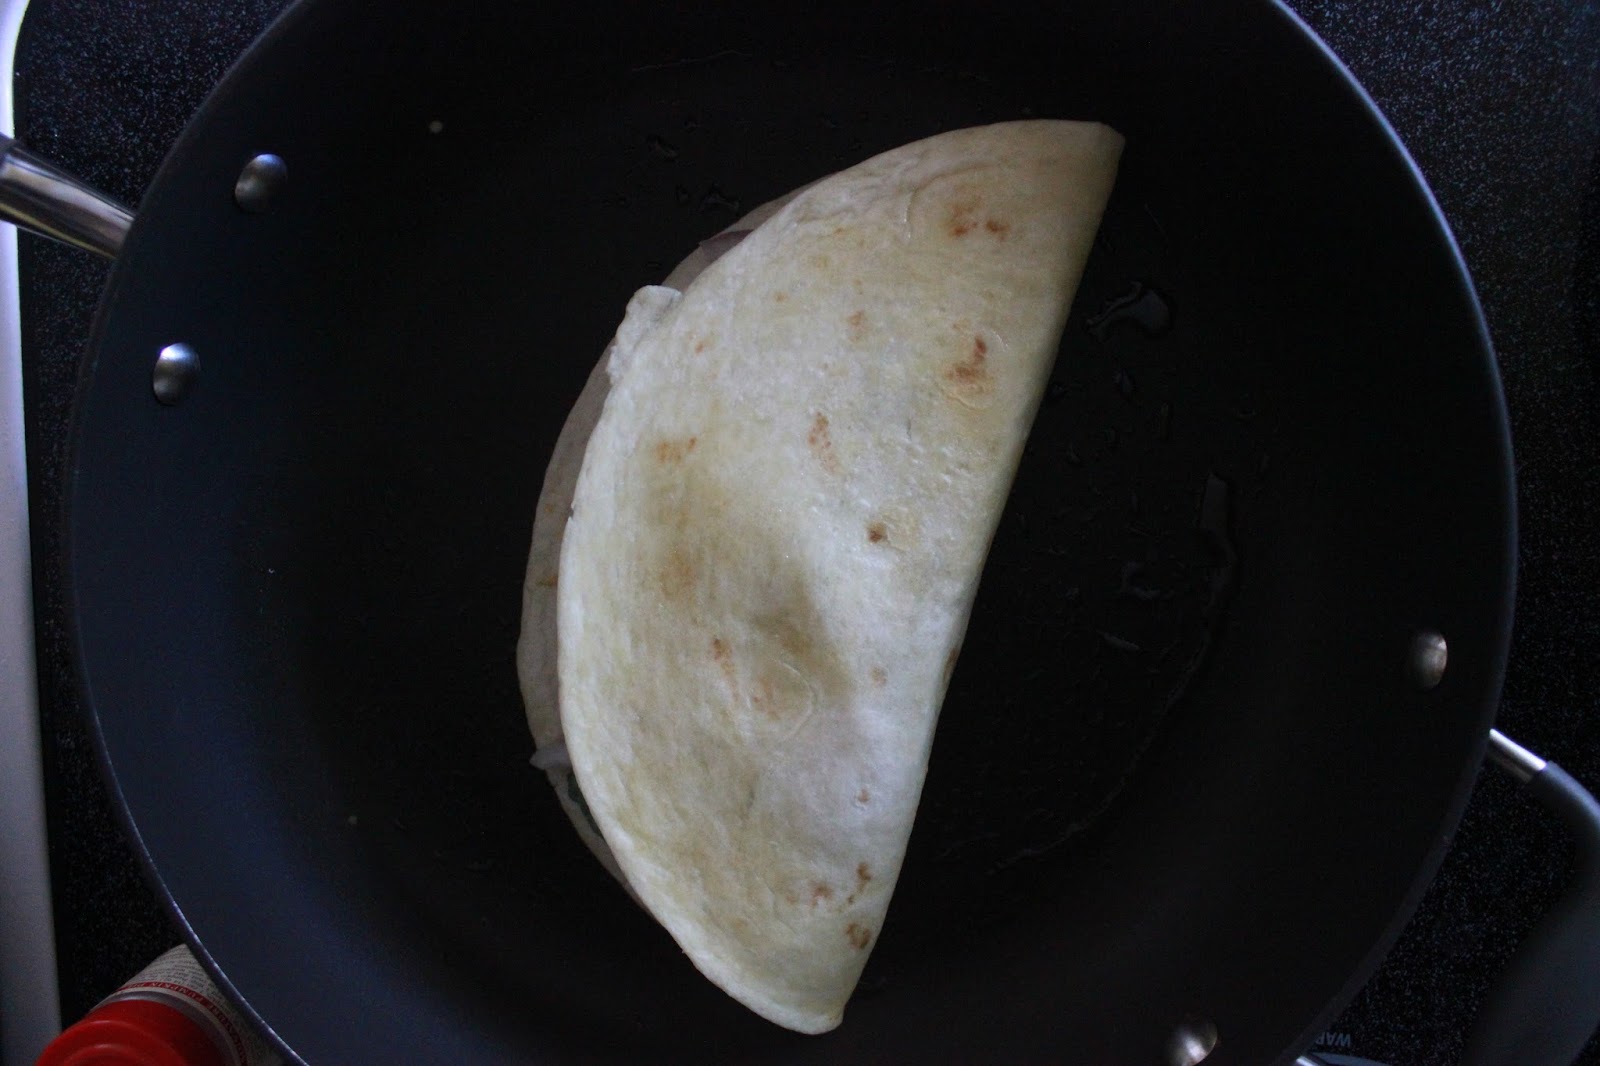
As for the actual cake, I simply did not have time to make 2 cakes in one night. I'm not Martha Stewart people! So we went the shady route with box cakes: one vanilla and one strawberry. The vanilla got the royal treatment with the water substituted with champagne. You could do the same with strawberry if so desired. 


The filling is lightly heated strawberries with a touch of sugar. You could use jam, as Apt 2B does. Strawberries happened to be on hand and I wanted a touch of freshness. Honestly, I think this is what made the cake stand out. Strawberries and champagne, heck yes. 


This cake was destroyed. Usually I'd snub a box cake mix but you know what- this came out awesome!  Check out Apt. 2B for their glamorous version and Chickabug for awesome breast cancer awareness templates!


Strawberry & Champagne Cake with Pink Ombre Frosting

1 box cake strawberry  mix
1 box cake vanilla (substitute water with champagne) mix
Champagne (love that Asti)
4 cans of vanilla frosting
16 ounces strawberries, cleaned and quartered
1 tablespoon sugar
2-3 tablespoons water

Grease 4 9-inch round baking pans. Prepare strawberry cake mix as directed. Divide amongst 2 pans and bake.

While that's going, prepare the vanilla cake as directed.  Remember to substitute the water for champagne. Divide amongst remaining 2 pans (or wait to reuse the one's from the strawberry cake). Bake.

Allow cakes to cool on wire rack to room temperature. Do not remove them too early from the pan or else they may crack. Using a cake leveler, saw cake tops so that they're flat and even. If you have a really good eye, you can use a long knife. All that matters is the cakes are level- save the sawed tops as a snack. Wrap the cakes in saran wrap and place tinto the freezer to firm up for about 30 minutes.

As the cakes firm up, make the strawberry filling. In a medium sauce pan, add the quartered strawberries, sugar, and water. Cook on medium heat until strawberries are tender and soft. If they start sticking, add a little more water- just enough to prevent sticking. Set aside to cool completely- put them in the fridge to expedite.

Let the stacking begin. Place on round of strawberry at bottom and lightly frost the top. Make sure the outside parameter is thicker so you can create a comfy lake for the strawberries. Add half of the cooled strawberry mix.

Stack a round of vanilla cake; frost the top. Add final round of strawberry. Same deal- frost with a thicker outside parameter to hold the strawberries. Add remaining strawberries. Top with last vanilla cake round. Frost the entire cake with a crumb coat (the dirty undercoat of the cake that catches all the fly away crumbs) with plain vanilla frosting. Set cake back into freezer to harden- this will make your life so much easier in the long run.

Divide one can of frosting into 4 small bowls. With red food coloring gel,create 3 shades of pink (keep one bowl pure white). Maybe 2 drops for light, 4 drops for medium, and 6 drops for dark? You be the judge.

It's go time. Take the darkest shade and frost a bottom row, then medium row above, and finally the light. Frost the very top the cake with pure white frosting. Lightly go over with a knife or off set spatula the division between layers till the slightly bleed together. If you want the circular effect, place the back of a spoon at the bottom of the cake and slowly turn the lazy susan a full 180. Place the spoon directly above where you started the first line and repeat until you make multiple rows up the cake. Rinse the spoon between rows. For the top, same technique- start from an outer point and spiral to the center slowly.

Saturday, October 20, 2012

Lovely Lemon Bars from Smitten


There's nothing quite like a lovely lemon bar. They were my original obsession at Starbucks (followed by the Black Bottom Cupcake). They've made a return, but only in bite sized portions. I wonder how bad the full bar I was eating back in high school- eep!

These lemon bars are from Smitten Kitchen. They were made for my girlfriend's baby shower.  We're all on edge waiting for the newest edition to the Daniel's clan. We do know it's going to be another little girl. Much to their dismay, they're having a really hard time picking a name. They knocked their first daughter's name out the park... so coming up with one just as good has caused many a painful hour at Barnes and Nobles, flipping through name books, and scribbling on notepads.


All I know is I cannot wait to meet this tiny person. She's going to be blessed with such a beautiful family. In celebration, unnamed baby Daniels, these lemon bars are for you!

What can I say? The recipe is from Smitten so they came out perfect! Everyone at the baby shower was singing their praises which made my imaginary tail wag. The crust is incredibly simple and basic- nothing fancy. It's good old fashioned butter and flour. The filling is decadent and thick. 6 egg yolks tend to have the effect on anything (just like the Rhubars). Plus lemon juice and lemon zest? Oh this is indeed a recipe for trouble. If you're looking for a fantastic lemon bar- I highly recommend!


For the full recipe, check out Smitten Kitchen's post! It will make you as happy as a kitty basking in sunshine.

Thursday, October 11, 2012

Lite Mixed-Berry Creamy Cheesecake & *Giveaway*


Don't you just love it when you set out to make one thing in the kitchen, and come out with something else entirely? I like to think of this Cheesecake as the bastard love child of Raspberri Cupcake's "Roasted Strawberry and Ginger Ricotta Cheesecake." See what happened was...

There was some left over ricotta from a previous meal. There were also gingersnaps from  the Apple, Blueberry, and Ginger Shortcrust pie.  We even had the cream cheese- probably from some Black Bottom Cupcakes.

What I didn't take into account was actually measuring how much of X, Y, and Z were remaining. Needless to say... there was not enough of any of the above ingredients to create the desired cheesecake. BUT! With a few... adjustments... the cheesecake could make it to the finish line! 


And so. I closed my eyes and said a little prayer for this unborn cheesecake, because I was making things up as I went. Not enough gingersnaps? Top it off with graham crackers! We're low on cream cheese? Hey, neufchatel is kind of like low-fat cream cheese! Let's just say this is the "healthy" version. The ricotta is struggling? Well. Everybody likes Greek yogurt! Throw it on in there; it has protein after all. Scientific process goes boink!

I am happy to announce that the cheesecake came out healthy and kicking. If you're looking for that "New York Sytle"... keep it moving. The texture of this cake is very creamy and much smoother than your average cheesecake. It's has a little weight to it which makes things a little complicated. On the one hand, you want to eat the entire thing because of the cold, soft texture. On the other, it's a bit filling.

And now! The giveaway!

This giveaway has a dual purpose: 1) I freaking love fall and wanted to share the warm fuzzies by giving a present; and 2) make the world a little kinder. Baker's twine and a notebook!


Tomorrow morning I am getting up at 4:15am to walk 60 miles to support breast cancer. It's through the 3Day which has received some political heat this year. I am pro-choice. This is not about ideologies. I'm doing it because I want to show my co-worker who was diagnosed last year that she matters. Susan, you're an inspiration.

So let's all get in the fall mood and try to make the world a little kinder. To win the giveaway, leave a comment with your favorite fall food and why it's your favorite! Winner will be selected at random. Don't forget your email! Giveaway ends next Friday.

Beijus!


Lite Mixed-Berry Creamy Cheesecake
inspired by Raspberri Cupcakes

Crust
250g Ginger Snaps, graham crackers, or a mix of the two
6 tablespoons unsalted butter, melted
Cake
200g neufchatel, softened
130g cream cheese, softened
200g ricotta
300g plain Greek yogurt
1/2 cup strawberry jam
1 cup mixed berries, frozen or fresh
2 tbsp ground ginger
1 tbsp grated lemon zest
3 eggs
1 tbsp cornstarch
1 tbsp water
Topping
1/2 cup strawberries chopped
1 tablespoon water
sprinkle of sugar or drizzle of maple syrup
or you could make Boozey Strawberries

Preheat oven to 350°Fm grease and line the base of a 9 inch round springform tin.  Place ginger snaps in a food processor and pulse until they are broken down to even crumbs. Add butter and pulse to combined. Press into the base of your prepared tin and chill in fridge for 30 mins. 
Prepare the filling; place neufchatel, creamcheese, ricotta, Greek yogurt, strawberry jam, ground ginger, and lemon zest in the bowl of a mixer with whisk attachment. On medium speed, mix until smooth. Add berries and mix in at low speed. 
Mix water and cornflour together in a separate bowl until smooth and then add the mixture and the eggs to the mixer. Mix until combined. Pour mixture over the chilled base and bake for 45 minutes to an hour. The edges should be just golden. Remove from the oven and sit in tin on a wire rack until cool. Refrigerate for at least an hour.

For the topping, heat a small sauce pan over medium heat. Add the strawberries and water. Cook until strawberries are slight softened and water evaporated. Add a dash of sugar or maple syrup.

Tuesday, October 9, 2012

Gluten-Free Banana Chocolate Pie


Pie. It's divine. 

This pie was a simple thought that became a runaway train. It was supposed to be a cute and easy Sunday evening dessert. The original recipe is from Family Fresh Cooking and it's gluten-free. The crust is almond meal and cinnamon bound together by oil (I used safflower). The filling is whipped cream mixed with mashed banana. That's it. Simple. Innocent. Concise. Crust, bananas, and whipped cream. Fin.

That's when I started thinking too much.


My version has chocolate pudding filling for more weight. Roasted bananas to bring out the fruity flavor. Tiny chocolate chips as garnish. And caramelized bananas on top. Woopsy! How did all that get in there?


Honestly,  this is a pretty quick pie to make. Don't let my extra fluff and stuff deter you. The pudding is based off the Choco-Coco Latte Puddin' recipe so that's already a win. You can use the full Choco-Coco Latte Puddin mix if you want to keep that touch of espresso. I kept mine virgin with almond milk and unsweetened coconut milk. It's smooth, rich, and ready to go in 30 minutes.


Use your favorite whipped cream recipe for the topping. They tend to have the same general formula and delicious taste! I roasted 2 bananas to bring out their natural juices, let them cool, and then added them to the whipped cream to bring out the banana flavor. Smooth it over the sweet, luscious pudding. Don't worry, it's supposed to be off-white in color- that's the banana talking!

The caramelized bananas are thick slices of banana, rolled in sugar and cinnamon, and then toasted in a flat skillet at a medium heat for about 4 minutes on each side. Just enough to brown them, not burn.


The crust is from the Family Fresh Cooking recipe. It's gluten-free with almonds, cinnamon, and oil. I love almonds but honestly, this was not my favorite pie crust. It keeps the form when cut but crumbles apart in your mouth. Mike commented that it would have been better to combine the almonds and cinnamon, then sprinkle the mix on top of the pie or in between the layers. If you have a favorite gluten-free crust, please share!

Smooth, creamy, and dreamy.

Note: Best served cold; mine was melting by the time we drove to a family dinner so I was quite distraught. Also, make sure those bananas are RIPE. 

Gluten-Free Banana Chocolate Pie
makes one, 9 inch pie

Almond Crust
from Family Fresh Cooking

1 1/2 cups Regular or Blanched Almond Meal
1/4 teaspoon fine Sea Salt
1/4 teaspoon ground Cinnamon
1/4 teaspoon Baking Soda
1/4 cup Sunflower, Canola or a neutral tasting oil
1 tablespoon Water

Pre heat the oven to 350 degrees F with the rack in the middle. In a bowl whisk together the almond flour, baking soda, salt and cinnamon. Break apart any lumps. Add the oil and water, combine with a spoon. Put the dough on a work surface. Knead the dough until well combined with your hands. Press dough into a 9 inch tart or pie pan. Be sure to press it all the way up the sides and evenly throughout the pan.

Put tart on a baking sheet and bake for about 15 minutes, until slightly browned. Take it out of the oven and let crust cool completely on wire rack. To cool the crust quicker place in the fridge or freezer until cool to the touch (about 15 minutes).

Chocolate Pudding
2 tablespoons cornstarch
1/4 cup coconut sugar
Pinch of salt
3/4 cup unsweetened coconut milk
3/4 cup almond milk
3.5 ounces semi-sweet chocolate (60% and higher)
1/2 teaspoon vanilla extract

Heat the water of your double boiler. If you don't have one (like me), heat about an inch of water in a small pot just to a nice simmer. Combine the cornstarch, coconut sugar, and salt in a heat proof bowl. Slowly whisk in both milks. Place over gently simmering water and give a it a good whisk occasionally, scraping the bottom and sides. Make sure all the dry ingredients are incorporated. After 10 to 15 minutes, the mixture will being to thicken.  Add the chocolate. Continue whisking just a few more minutes, until the pudding is smooth, thick, and all the chocolate is melted. 

Remove from the heat and stir in the vanilla. Place in fridge t cool, about 30 minutes, and spoon into ready-made pie crust.
Banana Whipped Cream

2 ripe bananas
3/4 cup heavy cream
2 Tablespoons powdered sugar
dash of vanilla extract
Preheat the oven to 325 degrees. Place the bananas on a cookie sheet. Bake in the oven for 12 minutes, or until the skins are black and they have started to seep. Remove from the oven , set aside, and let cool. Mash the bananas in bowl- don't those juices escape.
Whip heavy cream for 3 minutes. Add powdered sugar and vanilla extract and continue to whip until thick whipped cream forms.  Fold in bananas. Smooth over mix on top pudding.

Caramelized Bananas
1 ripe but firm banana
some light brown sugar or white sugar (1/4 cup should do it)
dash of cinnamon
non-stick spray or 2 tablespoons butter (if you're being bad)
handful of mini chocolate chips (optional)

Heat a small skillet on medium heat with non-stick spray or butter. Mix some brown sugar and a dash of cinnamon together. Chop bananas into thick pieces and roll in the sugar mix. Line on skillet and cook on each side for about 4 minutes- making sure they don't burn. Garnish the whipped cream with the caramelized bananas and chocolate chips.

Thursday, October 4, 2012

Choco-Coco Latte Puddin'


Sometimes you just want something sweet without a lot of fuss. That's where pudding comes in. No bake time; no kneading dough; no sifting dry ingredients.  It's as easy as making chocolate milk and even more delectable. Simplify, simplify.

Growing up, it seemed my mother could make pudding out of anything. Now that I'm head chef in my own kitchen, I've realized why: corn starch. Corn starch thickens anything and if you apply it to milk- ta da! Instant pudding. She would even make corn starch pudding (corn starch, milk, and cinnamon) which was one of her childhood desserts.


Of course, I had to try to make good ol' fashioned pudding a little fancy. It's sophisticated but not pretentious. Instead of milk or heavy cream, I used unsweetened coconut milk because it's thick and reduces nicely over heat. Regular white sugar was substituted with coconut sugar which has more nutritional value and a subtle flavor.  Some dark chocolate and a touch of espresso and voila: Choco-Coco Latte Puddin'.


The end result was superb. The coconut milk did just what I hoped and created a nice, thick pudding. Had it been fluffier, it could have been mistaken for mousse. The coconut flavor was very subdued as the chocolate stole the show with a nice, smooth espresso undertone.


And the best part... it takes 20 minutes to make (tops) and only needs 30 minutes in the fridge. It's about 5 minutes to get all your ingredients together, stove top time is another 10 (in which time you don't have to constantly whisk), and the final 5 are for pouring and placing in the fridge.


And with all that time you saved in the kitchen, you can spend it enjoying pudding, loving nature, and being with the people that matter in your life. Viva pudding!


Choco-Coco Latte Puddin'

makes 2 generous servings

2 tablespoons cornstarch
1/4 cup coconut sugar
Pinch of salt

3/4 cup unsweetened coconut milk
3/4 cup milk
3.5 ounces semi-sweet chocolate (60% and higher)
1/2 teaspoon vanilla extract
1-2 teaspoons instant espresso (how strong you want it? I used 1 teaspoon)

Heat the water of your double boiler. If you don't have one (like me), heat about an inch of water in a small pot just to a nice simmer.

Combine the cornstarch, coconut sugar, and salt in a heat proof bowl. Slowly whisk in both milks. Place over gently simmering water and give a it a good whisk occasionally, scraping the bottom and sides. Make sure all the dry ingredients are incorporated. After 10 to 15 minutes, the mixture will being to thicken.  Add the chocolate and espresso. Continue whisking just a few more minutes, until the pudding is smooth, thick, and all the chocolate is melted. Remove from the heat and stir in the vanilla.

Pour directly into a serving bowl or into a large measuring cup with a spout and pour into individual serving dishes. Place in fridge. Ready to serve in 30 minutes!

Monday, October 1, 2012

The Incredible Cinnabun Pancakes


You know you've cooked something extra special, when the first bite causes your dining companion to yelp. Yes, yelp. Mike took one bite from this stack of Cinnabun Pancakes and made a strange sound. It was a cross between yelling and crying. I was startled and feared he'd burnt himself. Then he looked at me with crazy eyes. Bingo. The power of Cinnabuns!


I am happy to report that these pancakes truly do taste like a giant Cinnabun... which means incredible. They have all the trademark characteristics: warm, gooey, cinnamon, cream cheese, and brown sugar. Serve them stacked on top one another to get the full, luxurious effect.


The base of the pancake is your standard issue mix- nothing fancy. You could even substitute with bisquick. If you're feeling super naughty, make your favorite buttermilk pancake but don't you dare try to make this healthy. There's no such thing as a whole wheat or rye flour Cinnabun. It's all or nothing, baby. Dive in.


Now the super cool part: the swirl. It's a simple combination of brown sugar, melted butter, and cinnamon. This step requires a steady hand and a sturdy piping bag. You could use a regular zip lock bag- just make sure it's not the flimsy kind or else you'll end up a buttery mess. You need it to hold its shape for control when piping the swirl. Also, before making the swirl, do a test line on a napkin because the initial squeeze tends to be a little thinner. Don't get too close to the edge of the pancake or else it can run.

Most importantly- don't stress if the swirls are not perfect! It tastes all the same. Draws hearts and stars, have fun with it!


The "syrup" is cream cheese glaze consisting of, you guessed it, cream cheese, butter, vanilla extract, and powdered sugar.  We found it rich and used very little- just a thin coat on the top pancake to create that Cinnabun flavor. If you want to be extra naughty, spread a thin coat in between each layer.

Serve these delicious pancakes with a tall glass of milk or your favorite coffee. It's like having a Cinnabun fresh out of the oven! Heck yah!

For the fabulous recipe, check out Recipe Girl's post for Cinnamon Roll Pancakes.