Saturday, September 22, 2012

Dragon Drumsticks


Some of my fondest childhood memories center around BBQs with our extended family, the Duartes. The feast began usually after Sunday church. On occasion, the moms would actually skip mass just to ensure there was enough time to cook everything to perfection. Friends would lick their chops, hoping to be invited. See where the food fetish comes from?


The highlight of these meals was the spicy chicken. OOOOoooo weee that chicken! We had a serious obsession with heat. Olga would take fresh peppers from her garden and dry them out, then blend them in the food processor to create fresh red pepper flakes. I remember looking up at her in the kitchen as she waved for me to stay away from the red cloud with one hand while rubbing tears from her eyes with the other. Another time, mom and Olga got in cahoots to try and take me down. They made the chicken super spicy, sat back quietly at the table, and slyly watched for my reaction on the first bite. Yah, that was some hot bird.

Needless to say, I saw this recipe for Dragon Drumsticks and got fired up (boo). Green chiles and garlic? Oh yes, this is happening.


The only issue is there was a slight discrepancy in the directions about the use of vinegar. I did some research to find the original version by Nigella; it does, indeed, use rice vinegar. This copy past error made me crazy for about 5 minutes trying to figure out where I missed the vinegar! There is also garlic oil in Nigella's version which makes my brain salivate at the thought.

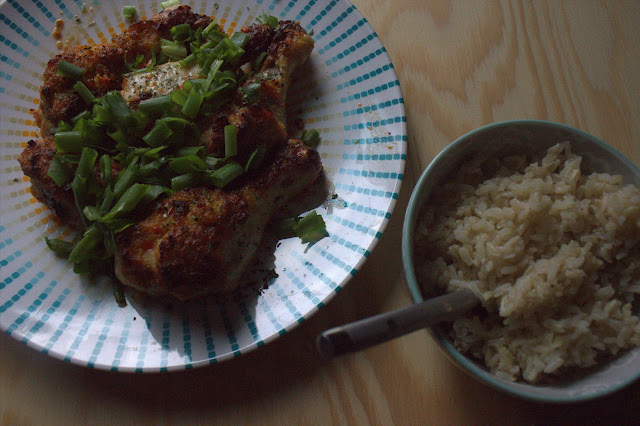
Don't be scared about the green peppers... it smelled super spicy and I was very nervous but we were not at all impressed with the heat of the final product. Mike and I like it hot. I also thought that the amount of oil was a bit excessive for about a pound of chicken.


Next time, I'm going to try the original version as a taste comparison. This one was okay, it marinated over night, but was missing that oumph I was so looking forward to. If you're a mild flavor kinda person, check these out.

For this recipe on Dragon Drumsticks, check out 1big bite who modified it from Nigella Lawson.

Sunday, September 16, 2012

Mocha Squares from Scandi Foodie


What lured me into trying these "Mocha Squares" from Scandi Foodie was their background: Finnish. What does a Finnish Mocha Square taste like and what makes it Finnish? Well. I do know the answer to one of those questions: delicious. 

I made these squares during one of our video game nights- just a bunch of dudes hanging out. Our friend, Brandon (aka Kuya), sat on the floor with me going through wedding magazines. He had just had his wisdom teeth removed and was running on empty. Real foods weren't doing it for him and he does not have a sweet tooth. I decided to make the squares on a whim- they looked soft and welcoming, maybe he'd at least nom on that.


So uh... Brandon ate about half the pan on his own which is unheard of. You're lucky if he'll eat more than a single cupcake! Sweets just aren't his thing. These squares were the perfect balance of super soft, slightly sweet cake topped with a thin layer of rich glaze, dusted with fine dried coconut. The cake is very light and airy- these should be renamed Mocha Cloud Squres.  The glaze is rich and addictive (Mike wanted lots more glaze), as chocolate paired with coffee tends to be. 

The new thing about this cake for me was ground vanilla. Honestly... I don't know how this is any different than vanilla extract. It does, however, smell like vanilla crack. There's almost a coffee scent. We stood around the kitchen taking turns sniffing the bottle. Don't hate.

For the recipe, check out Scandi Foodie! She also has a reduced fat version of this recipe as well.

Monday, September 10, 2012

Greek Yogurt-Lemon Tart

greek yogurt lemon tart

Here's quickie but goodie for left over pie dough: mini tarts. This filling is very basic and highly adaptable. The core ingredient is Greek yogurt- from there, sky's the limit. Greek yogurt is wonderful because it's full of protein and very little fat. It provides a very smooth palette to work with. Subsitute lemon with any other juice or berry you so desire, as I did! We loved the subtle sweetness and freshness of the lemon mixed with muscavado sugar.


The left over pie dough is from the Apple, Blueberry, & Ginger pie.  It is simply pressed into 4 5-inch pie tins. If you don't have any pie dough just lying about, I have listed 2 tart crusts that I have found delightful in the past. Just be sure to modify the baking time of the crusts accordingly!

My apologies for the obviously settled blueberry juice and whip cream! The dark spots on the custard is the sprinkled muscavado sugar, absorbed. Got a little distracted when I was supposed to taking pictures.

The original recipe comes from 101 Cookbooks.


Greek Yogurt Lemon Tart
modified from 101's Yogurt Tartlette
makes 4, 5-inch tarts

Filling

1/2 cup Greek Yogurt
1 egg
1/2 tablespoon lemon zest
2 teaspoons fresh squeezed lemon juice
1 teaspoon brown muscavado sugar, plus more to sprinkle on top
handful of mixed berries, fresh or frozen
dollop of whipped cream (optional)

Crust

Leftover shortbread pie crust- I used it from the Apple, Blueberry, & Ginger pie;
or halve the recipe from 101's Yogurt Tartlette
or halve the recipe from Cannelle et Vanilee's Pistachio & Lemon Shortbread Tart

Bake the crust however the recipe requires. If you're not sure how long it takes in a tart tin, simply bake at 350 until LIGHTLY brown, not entirely cooked through. You still need to cook the filling!

Preheat oven to 350. 

Combine the yogurt, lemon juice, lemon zest and muscavado sugar in a medium mixing bowl. Taste. Now stir in the egg until well incorporated.

Fill each tart shell with about 1/4 cup of filling, don't worry if you have a bit leftover. Bake for about 10 minutes. The filling should be set, and no longer jiggly. It may take longer depending on what crust you used. Remove the tarts and let cool for ten minutes. 

Let cool to room temperature or refrigerate for a couple hours. Serve topped with a dollop of whip cream, berries, and a dusting of muscavado sugar.

Thursday, September 6, 2012

Apple, Blueberry, and Ginger Shortcrust Pie

When I first started this blog, the intent was to write about nothing but cupcakes. Frosting and cake, all day every day. Some people have that amazing, laser focus. Me... not so much. By the second post, I was talking about Vietnamese Coconut Waffles


My affinity for cake has slowly dwindled over the years as my palette has evolved. I've strayed away from the sugary confections and lean towards more natural sweeties like fruit and super dark chocolate. Pie in particular has become a new love interest. Oh hello pie...


Peach and Crème Fraîche Pie was the first attempt, a safe bet with no fancy top crust. It came out well so I figured I had the pie game down pat... until I tried making Strawberry and Rhubarb pie. Good grief... I didn't even know what "tapioca" pearls were and substituted with boba pearls... you know- the stuff you put into bubble tea.  Definitely did not do the trick... soggy bottom pie indeed. It's about learning as you go.


Needless to say... the new recipe book by What Katie Ate immediately caught my eye. Every time I check her site my mouth salivates oceanic amounts. Her Apple, Blueberry, and Ginger pie was already on my pinterest list of "things to make" but seeing it on the cover of her new book renewed the curiosity. It seemed like such an interesting combination of flavor. So let's break it down!


What makes the crust unique is the incorporation of crumbled ginger snap cookies. It makes a slightly hearty crust. See above? I put too much in that one corner for serious thickness. It can be difficult to work with and Katie notes that you may have to force it to cooperate. By force, I mean plastering it together within the pan into one cohesive crust; it tends to crumble when being rolled out. Mine was doing well until it got to edges, then I had do resort to the plaster method.


This recipe only makes the BOTTOM crust; the top is store-bought. If you feel like going the extra mile and making 2 different crusts, go for it. I was tired and went with the cheaters method. Is it as good as the home made stuff? Meh, it's not as flakey or buttery but it's easy to work with and gets the job done!


This pie uses a 8.5/21.5 cm springform pan. I do not have said pan and used what we had... a 9inch round springform pan. There was some left over crust which I used to make mini pies the next day! Don't force all the pie crust if you don't have a big enough pan. As stated, it's a hearty crust and if it's too thick, it will make some poor soul's slice of pie way too bottom heavy.


I made the filling the night before to let all the juices get to know each other. It needs a total of 25 minutes on the stove top, then the additional cool down period. If you don't have time to do it the night before, at least prep the 5 apples that go into this bad boy. Blueberries and apples are a new concept in my world but they paired rather nicely. Bear in mind, this is NOT a super sugary sweet tasting pie; it's very mature and sophisticated. 


Another super yummy aspect of this pie is the left over juices! After you cook the apples, blueberries, and ginger together, you drain out the excess juice and set aside. When ready, you heat it up in small sauce pan with a little lemon juice. Let it sit there until it reduces down to about half the amount.When ready to serve, drizzle some on each slice. Oh my...

In my humble opinion: this pie is best served cold or at room temperature, with a tiny scoop of vanilla icecream topped with the berry juice. 

For the recipe, check out What Katie Ate's blog post and her fresh off the presses book!